

The main Chatify dashboard
Managing Questions
All the questions asked using the Chatify widgets on your website are pushed into your Chatify dashboard, this is where the main action takes place. Here you will see all questions and activity relating to your team. From here you can manage questions, groups and FAQs, assign questions to teammates and chat privately with them.
Dashboard Interface
The interface is split into three main areas
The left area is where you access your questions, view groups, team members and access the knowledge base.
The middle area is the main display area where you will see questions, group conversations and information about the question and author.
The right area offers quick access to functions such as personal notifications and notes.
Question Format
Question number - each question has a unique number, so you can easily reference a question to another member of your community, or just type it in a group chat whenever you need help. To reference a question just type 'Q' followed by the question number, for example "Q42", this question will then be embedded into the chat.
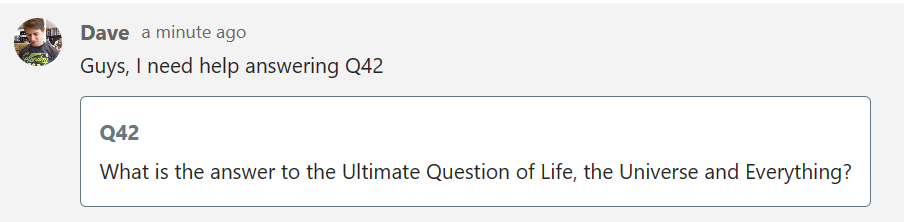
Referencing question "Q42" in chat
Question date - The time you see under the Question is the time passed since the visitor asked the question. So the less time until you answer, the better
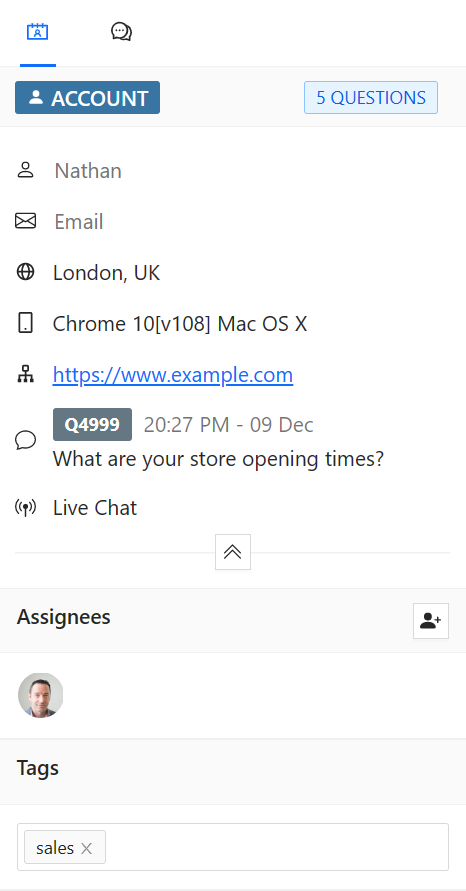
Assign - Use the + sign on the question card to assign someone inside your community to a question. That means that the question will appear in their "My Questions" stream and they will get a notification
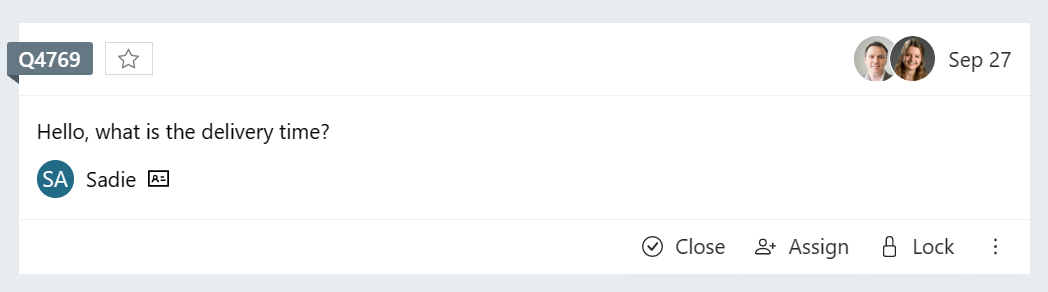
The avatar on the right shows who has been assigned to the question
Unread - If you haven't read the question you will see the tag coloured red on the question card. Someone might have read it but not you.
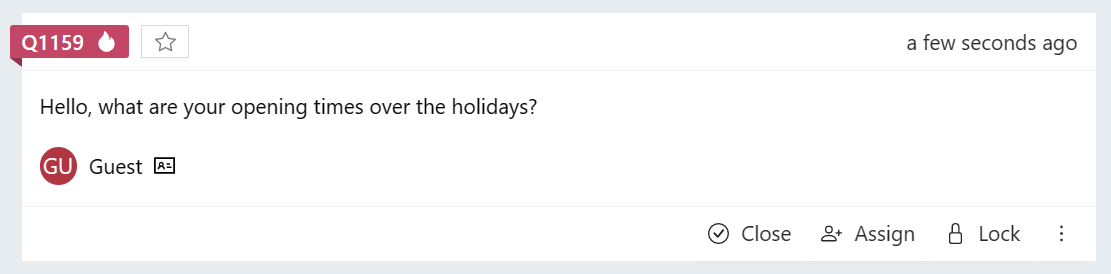
Unread question marked red
Resolved - When the tags on a question card have a tickmark, then the status of that Question is "resolved". This means that either one of your colleagues or Pubblebot has provided an answer and the question was manually closed. So your customer is happy!
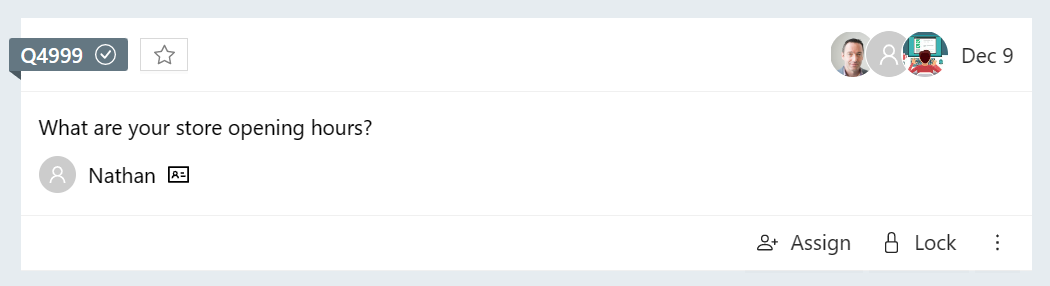
Resolved question marked with a tick
Assign Questions
You can assign a question to one or more teammates or groups. There are two methods to assign: manual assign and auto assign
Manual Assign: to manually assign someone to a question click the "Assign" option on the question. You will see the dialog which displays teammates and groups on the left side, clicking them will move them to the right side. Once you have selected those you want to assign finish by clicking the Assign button.
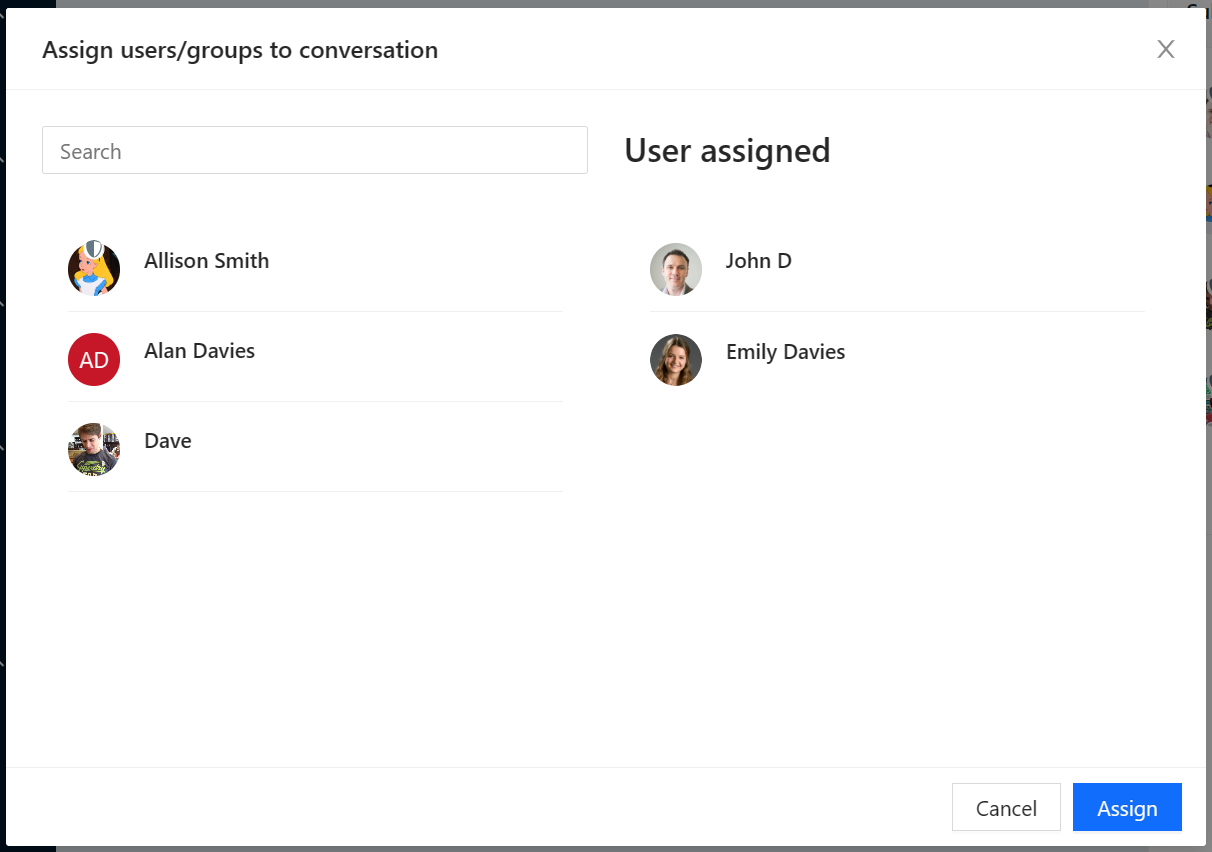
Assign dialog
Auto Assign: teammates or groups can be automatically assigned to questions based on the webpage URL the question was asked on or by a keyword in the question. To set up auto assign you need to access the admin center: Community > Actions > Add Assign Rule

Adding a new auto-assign rule
In the Assignee input type the name of the teammate or group you want to assign to and they will by prompted below, clicking them will select them for auto assign.
Select a Rule Type of either URL, Keyword or App and in the Rule Value input either a URL, keyword or select the app, depending on the rule type you selected.
If you select the URL rule type you can use either a full URL path or a URL with a wildcard (*), for example www.pubble.io/demos/* anything after the wildcard will be matched, such as www.pubble.io/demos/messenger
If you select the App rule type you can auto-assign when a question is asked on that app. However this is only recommended for assigning to groups. For individual users we recommend you add that user as a subscriber or moderator of the app.
Adding an auto-assign rule for Facebook Pages: If you want to auto-assign questions asked via the Facebook integration you will need to add a URL rule based on the following URL pattern: www.facebook.com/page-id, for example: www.facebook.com/123456789
Tagging Questions
You can add tags to a conversation enabling you to categorize and easily find them later using the search function. Questions can be tagged either manually or automatically.
Manual Tagging: To tag a conversation open a question and enter the tag on the right-hand side, click "Add" to attach it to the conversation
Adding a new tag
Conversations can be conveniently searched by tag from the right-hand side. You can also search by multiple tags by clicking them. The number next to the tag indicates how many conversations are attached to that tag.
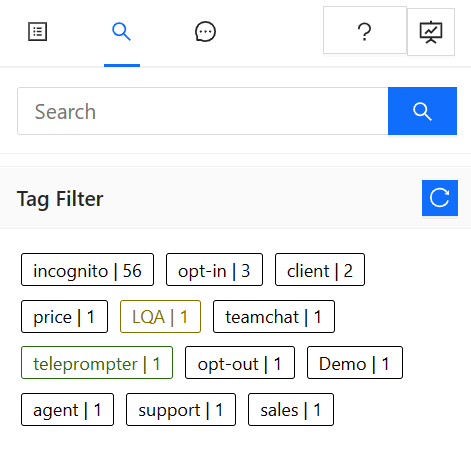
Listing and filtering by tags
Auto-Tagging: You can tag a question automatically based on webpage URL the question was asked on or by a keyword in the question. To set up auto tagging rules you need to access the admin center: Community > Actions > Add Tag Rule
Note: To use auto-tagging you must first define a Tag in admin center: Community > Settings > Tags
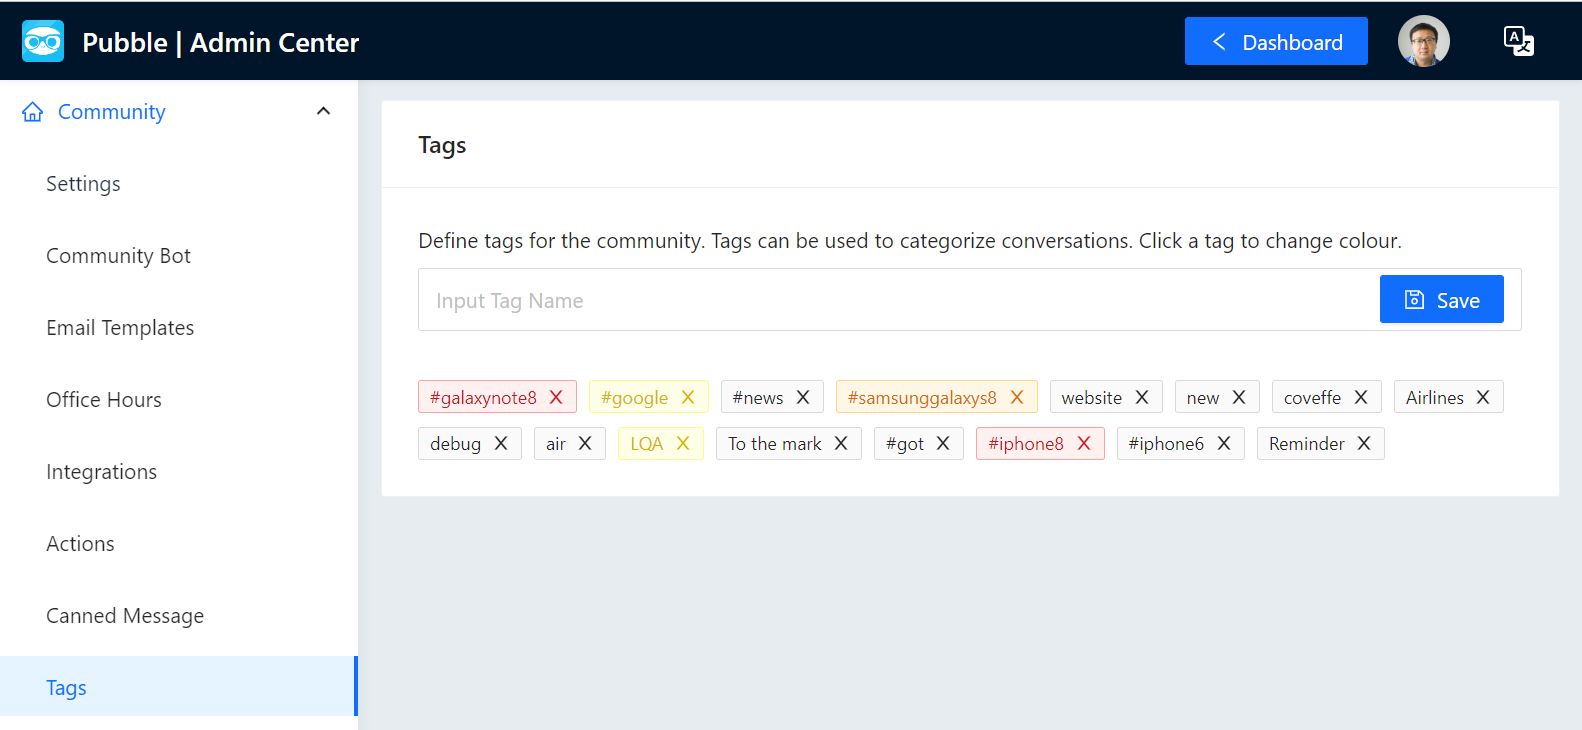
Adding a new tag
Once you have defined at least one tag you can then add a auto-tagging rule via admin center: Community > Actions > Tag Rules
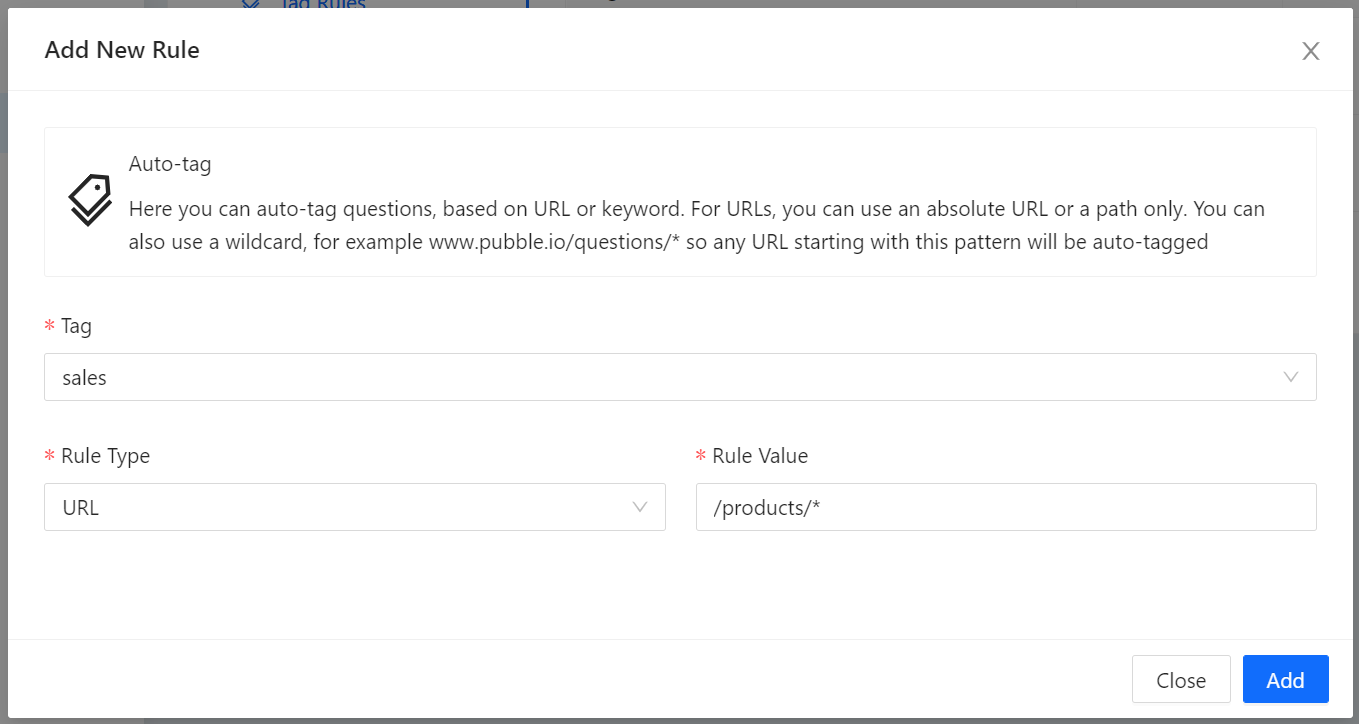
Adding a new auto-tag rule
In the Tag drop-down selection, select the tag you want to use for auto-tagging.
Select a Rule Type of either URL or Keyword and in the Rule Value input either a URL, keyword, depending on the rule type you selected.
If you select the URL rule type you can use either a full URL path or a URL with a wildcard (*), for example www.pubble.io/demos/* anything after the wildcard will be matched, such as www.pubble.io/demos/messenger
Adding an auto-tag rule for Facebook Pages: If you want to auto-tag questions asked via the Facebook integration you will need to add a URL rule based on the following URL pattern: www.facebook.com/page-id, for example: www.facebook.com/123456789
Deleting Questions
Sometimes you may need to delete questions, if there is offending content for example. App subscribers and moderators are able to delete a conversation.
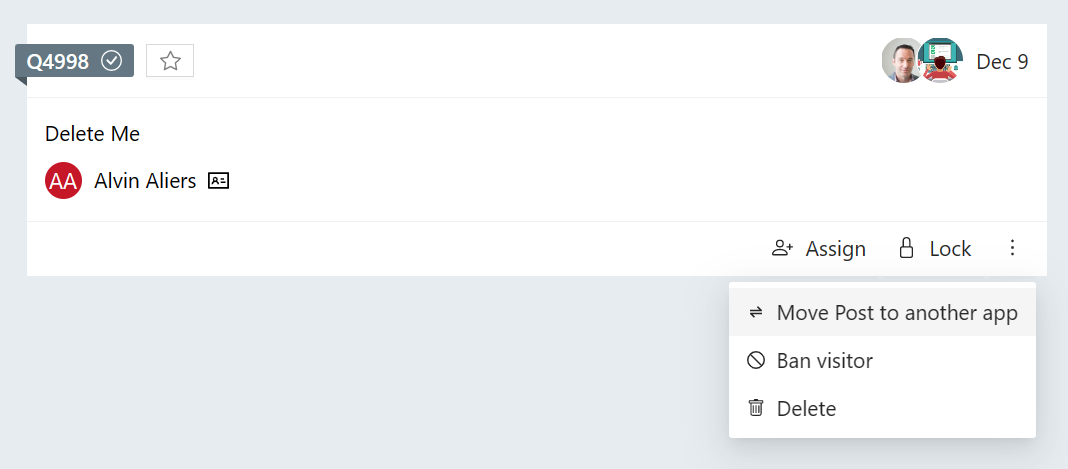
There are several ways to delete a question, the first is from the question tile itself:
Delete from question tile
The second way is from the opened conversation, by clicking the hamburger icon and selecting Delete:
Delete using the context menu
Canned Messages
Canned messages are short pieces of pre-entered text which can be used to quickly reply to a conversation, making typing common responses more efficient.
Invoking a canned message
To reply to a conversation using a canned message simply type the slash key in the input box \ the available canned messages will then appear, from which you can select.
To make selecting canned messages easier, each canned message has an associated command and multiple messages can belong to the same command so that they can be grouped. For example, if you type \greeting then only related greeting messages will be displayed.
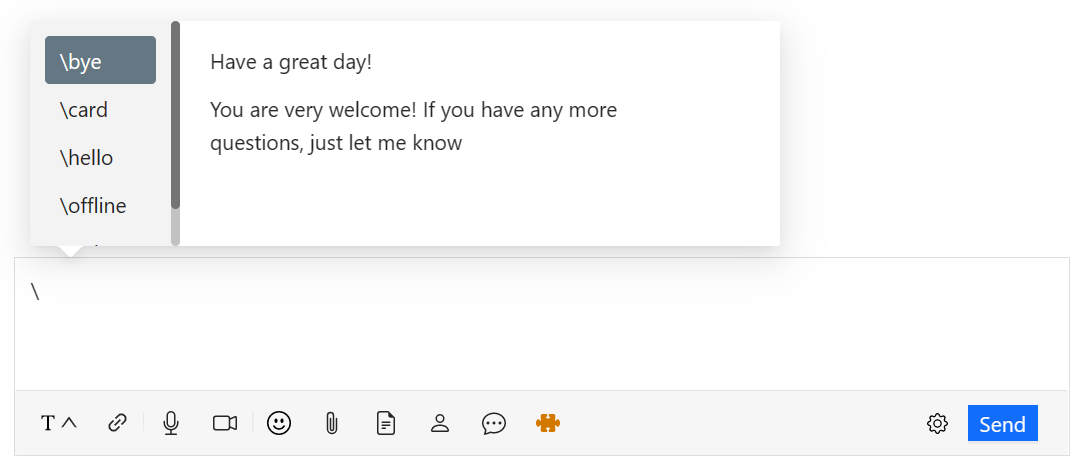
Using the slash command to add a canned message
Adding a canned message
To add a canned message visit the admin center and go to: Community > Canned Messages > Add Canned Message
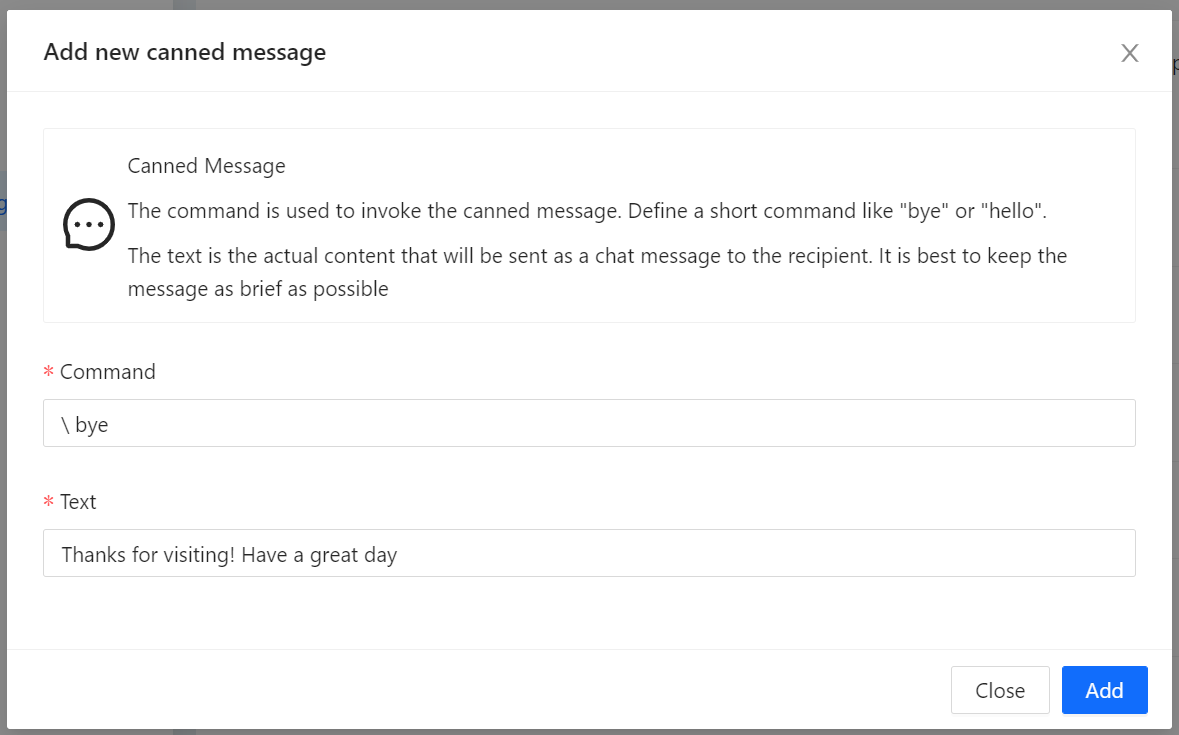
Adding a new canned message
Exporting Questions
You can export questions in spreadsheet format (.xls) by widget and time frame. To export questions go the admin center and go to Import/Export > Export > Questions
Email Delivery Status
If the visitor left an email address to be notified of your replies to their question, you can view the status of the email delivery in the notification message in the conversation, which will appear as a colour coded tag:

Notification message with delivery status tag
The following statuses are possible:
Dropped
The email was not delivered. This is normally due to an invalid email address
Bounced
Receiving server could not or would not accept message
Deferred
Recipient's email server temporarily rejected message. Will attempt to deliver again later
Delivered
Message was successfully delivered to the receiving server
Opened
The recipient opened the email
Note: normally the email is delivered to the user instantly, however there may be a small delay in feeding back the status of delivery to the dashboard.
Email Notifications
Email notifications for team members are only triggered to them if they are offline. The logic behind this is that if you are online, then the in-app notifications should be doing their job. You can be online on a browser, a desktop app or mobile.
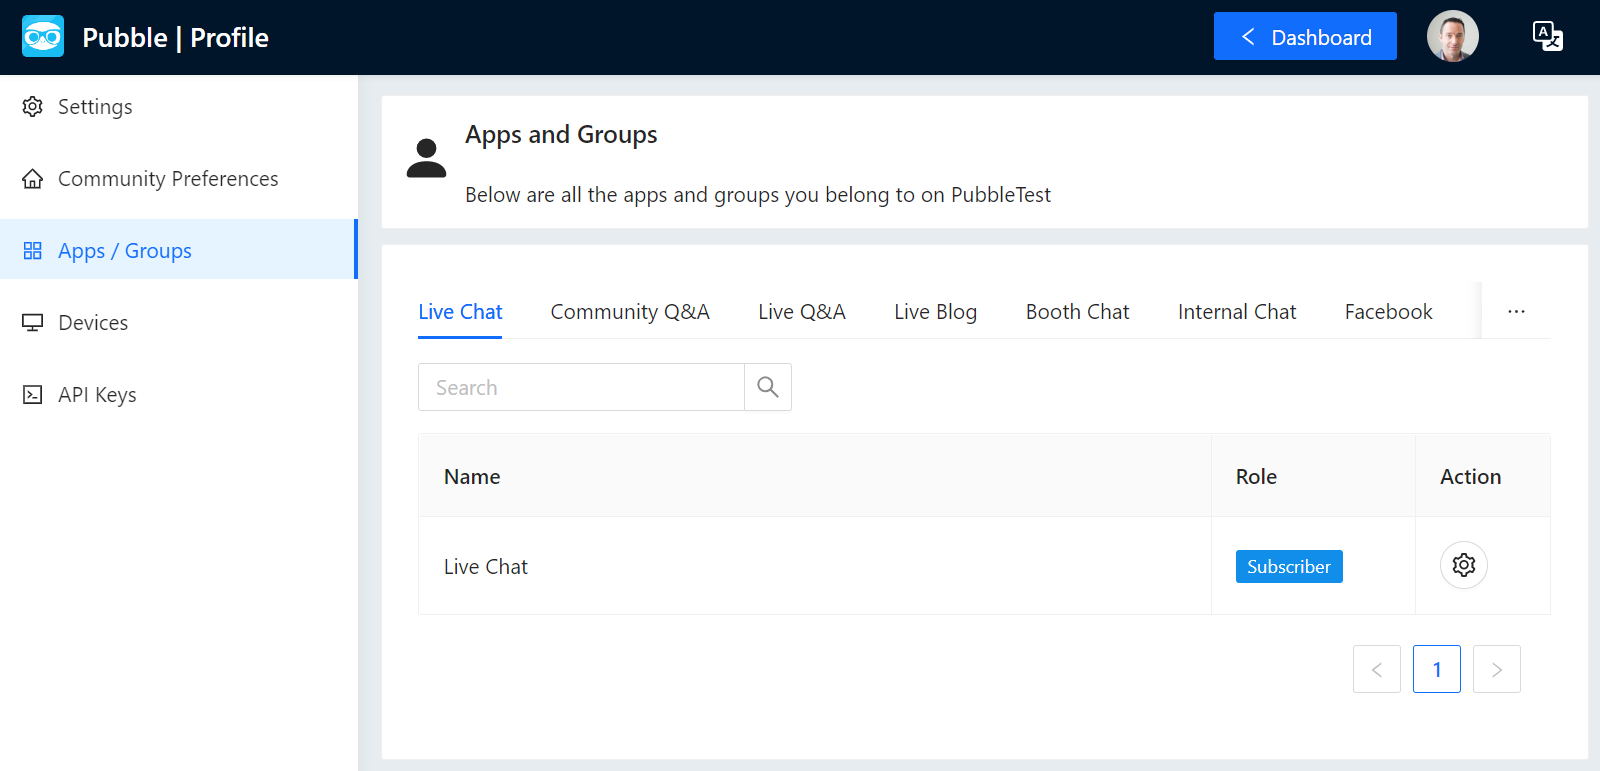
You can change the email notification settings in your profile area http://[community].pubble.io/profile > Apps / Groups. The settings for email notifications are individual to each person. It's important to note that the settings apply to email notifications only. The in-app notifications are always on.
Click the options cog to select Email Notifications settings
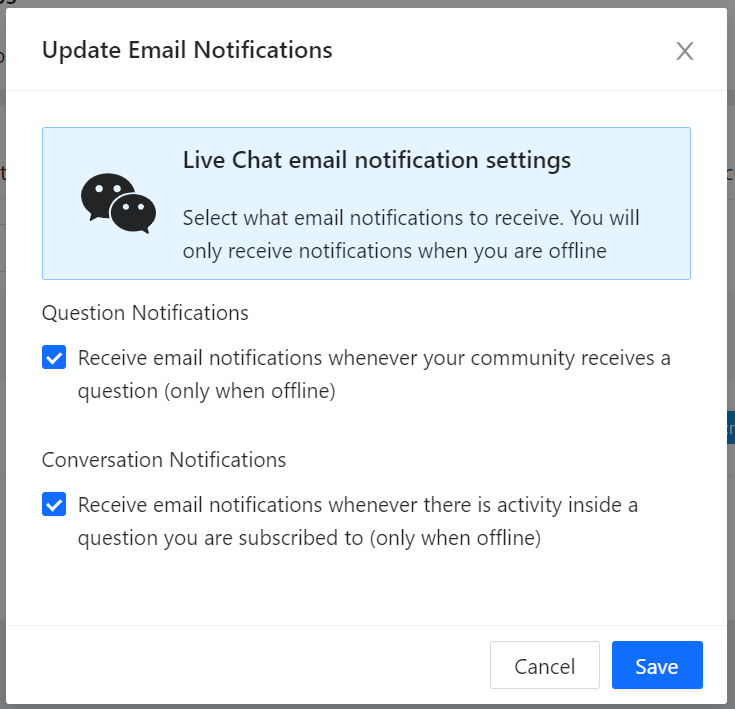
The available options for the Live Chat app (example)
By default, the following are the settings for email notifications:
For new questions: If you are offline, you receive an email notification of a new question.
For activity within a question: If you are offline, you don’t receive an email notification for activity within a question, if you are assigned to that question. (By replying to a question you are automatically assigned to that question. If you manually assign someone to a question or if there is a rule set up to automatically assign someone to a question, then they become part of the workflow for that question).
Banning Users
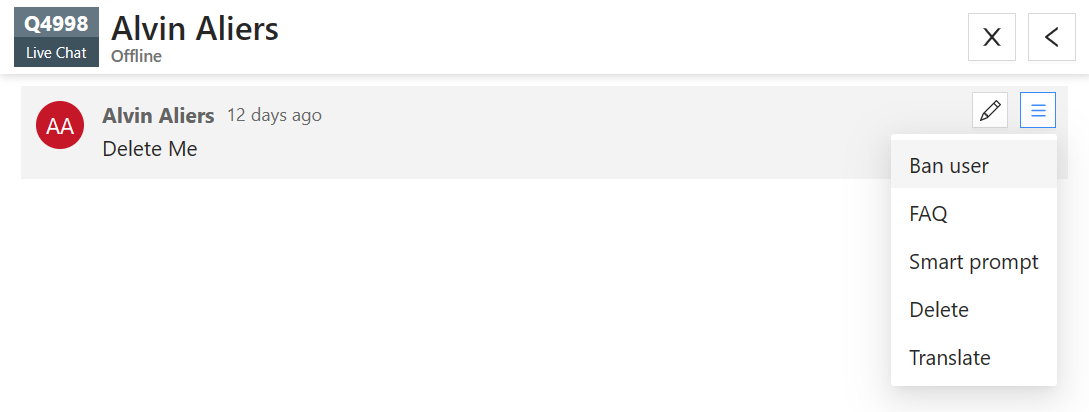
Sometimes it may be necessary to block nuisance users. You can ban a user from within a question by hovering over the message they sent and clicking the grey dot that appears to bring up a context-sensitive menu. 'Ban Visitor' is one of the options here. Only app moderators or subscribers can ban a user. Once a user is banned they will not be able post new questions/replies to any of your Chatify widgets
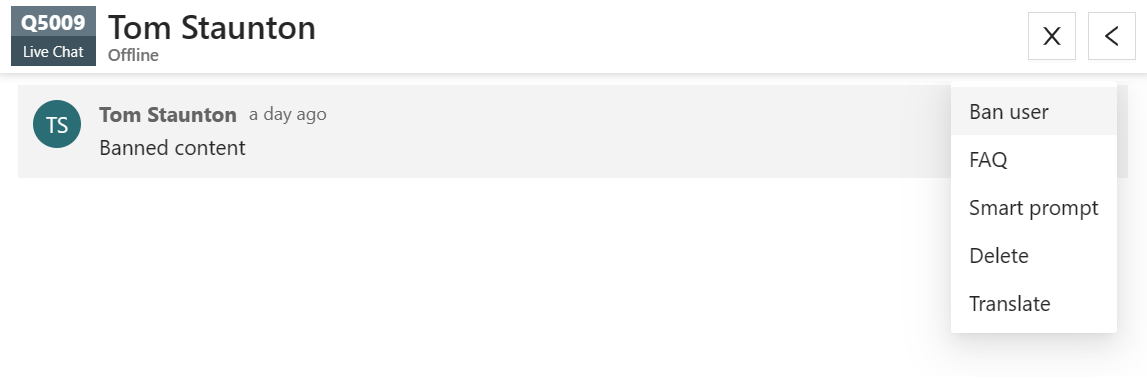
Ban a user using the action menu
You can view banned users in the admin center by going to Members > Banned from here you can unban or add new banned users. You can ban a user based on IP address or by email address
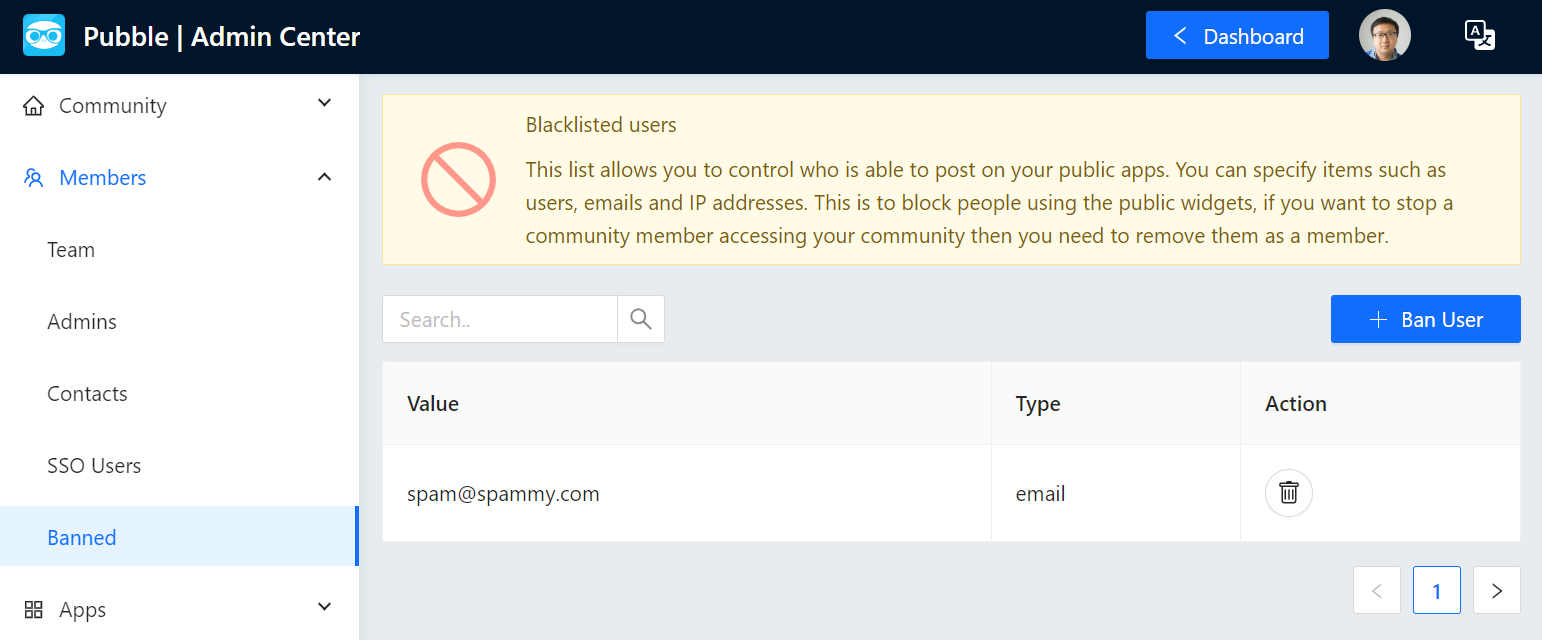
Banned users